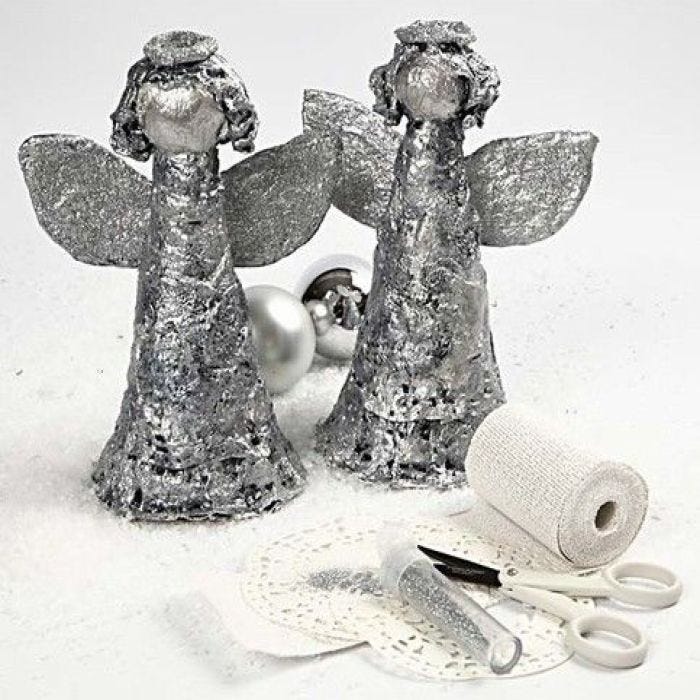
Christmas sounds heavenly
#v11798
The pieces of gauze bandage (soaked in water) are wrapped around the cone and used for making the head and wings. Painted with Plus Color and sprinkled with silver glitter.
Comment faire Téléchargez nos instructions étape par étape

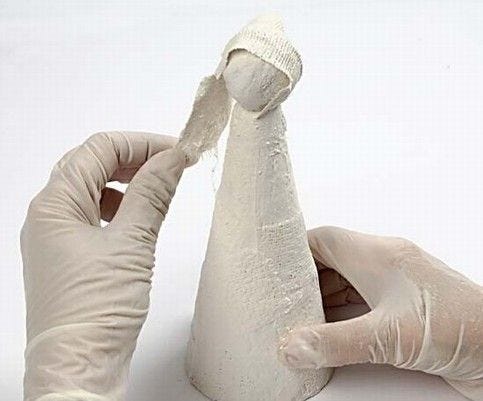
1. Cut off the top of the cone and cut the gauze bandage into small pieces.
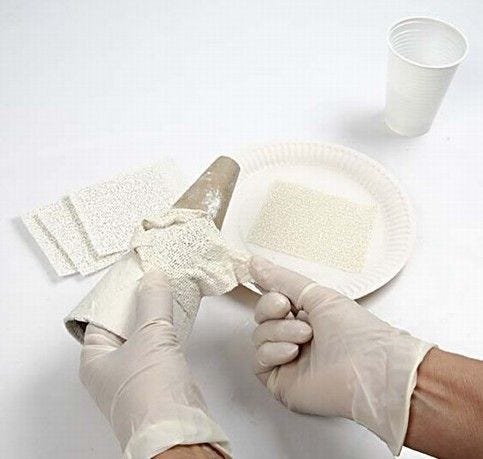
2. Soak the gauze bandage in water and wrap it around the cone.
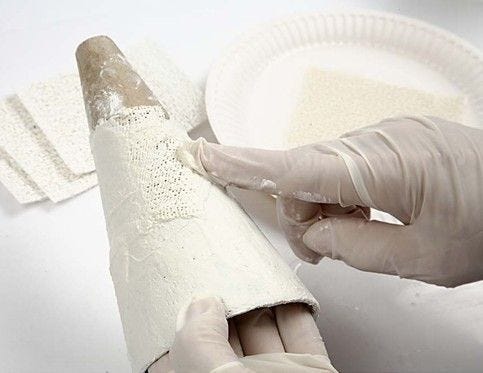
3. Gently smooth the first layer of gauze bandage.
4. Make a small ball from gauze bandage (the head). Put small pieces on top of another.
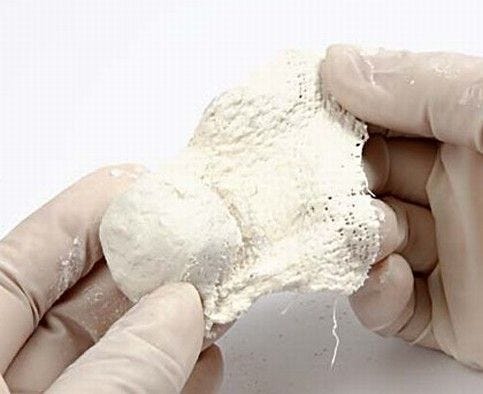
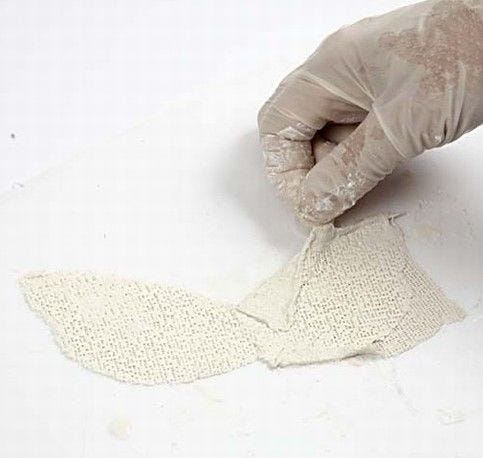
5. Make a “gauze glue” to be used for when parts need to be attached onto the cone. Rub a large piece of gauze bandage over a plate so gauze dust drops off and mix it with water. “Glue” the head onto the cone and secure with additional small strips of gauze bandage.
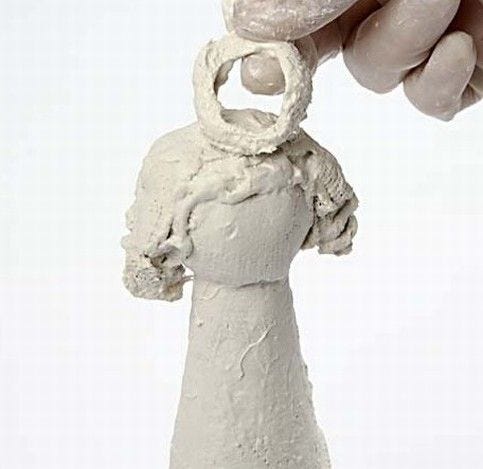
6. Squeeze gauze bandage to make hair and narrow strips to make a halo.

7. Additional pieces are wrapped around the cone. Squeeze slightly to make the surface a little rough. Make a “frill” at the bottom.
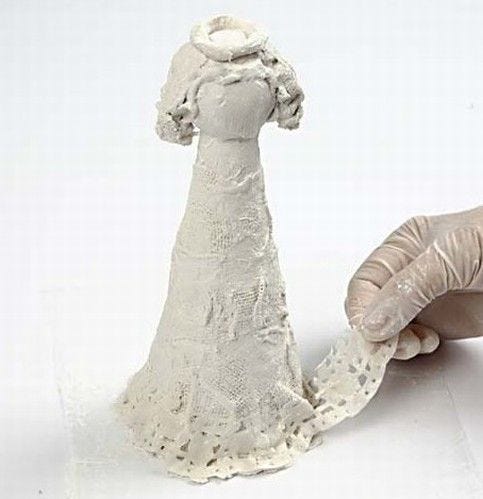
8. Cut out the middle of the cake napkin. Dip the patterned border in “gauze glue” and attach at the bottom of the cone as a collar if you wish.
9. Cut out wings and wet them. Attach pieces of gauze bandage, turn over the wings and fold in the edges forming three to four layers. Reinforce the middle with additional small pieces of gauze bandage.

10. A piece of "lace" may be attached to one side of the wing. Attach a lump of gauze bandage on top of the middle (because the cone has a conical shape).
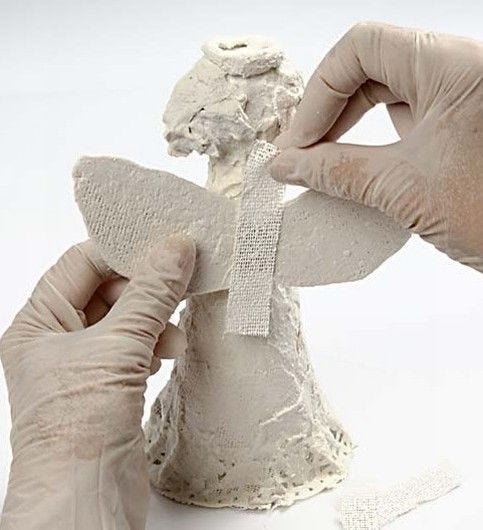
11. “Glue” the wings onto the body and reinforce with four or five narrow strips fastened to the body.
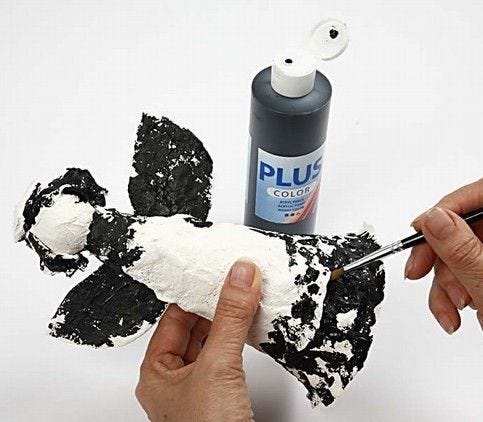
12. When the gauze bandage is completely dry, paint it black. Not necessarily all over, but certainly in every hole and indentation. Use a pointed brush. Let dry.
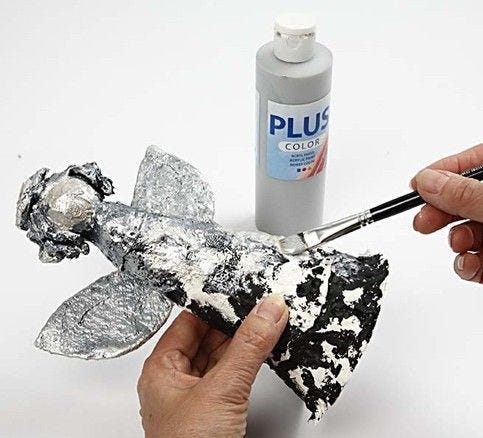
13. Paint silver all over with a flat brush. Run the brush lightly over the surface, so the indentations remain black. You may apply several coats.
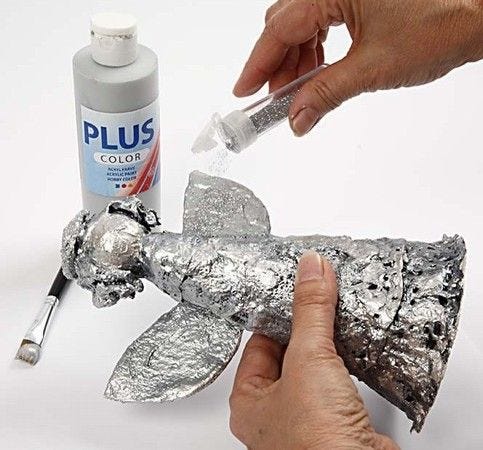
14. When dry, paint the wings, halo, lace etc. and sprinkle glitter onto the wet paint.
Allez aussi explorer dans