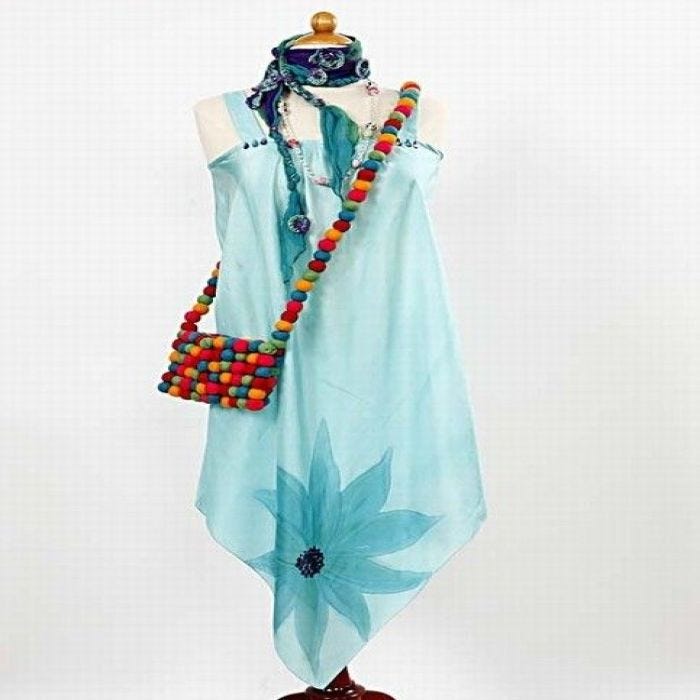
Silk dress
#v11294
You can make a summer dress for bikinis from two crinkle chiffon scarves. Paint the silk with steam fixed water-based silk paint, then cut the scarf and sew together.
Comment faire Téléchargez nos instructions étape par étape
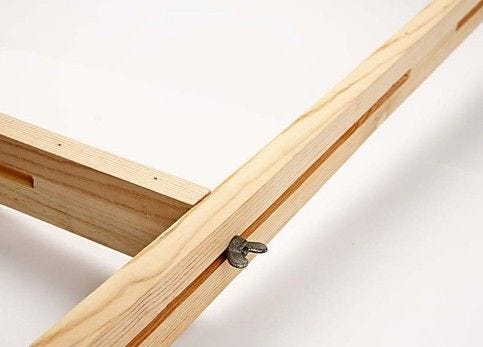
1 Assemble the silk painting frame:
To make a frame, assemble two sets of two sides - each side measuring 120cm.
.jpg)
2 Attach rubber bands to the suspension hooks and attach these onto the sides of the frame at the upper edge.
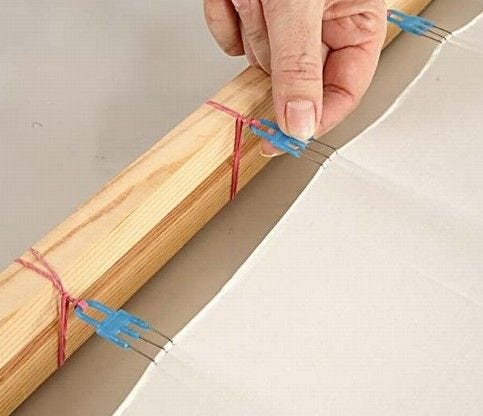
3 Attach the suspension hooks to the silk. Tighten the frame so that the silk is tight.
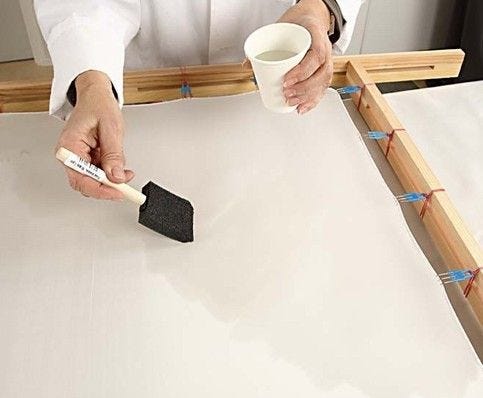
4 If you brush the silk with water first, then it is easier for the colour to run without drying too quickly (and forming blotches).
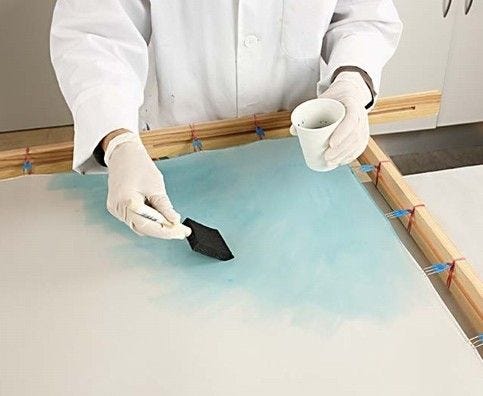
5 When it comes to colouring two pieces of silk, it's a good idea to count the drops of colour in the same volume of water. The colour here is very diluted. You can add more colour gradually if you wish.
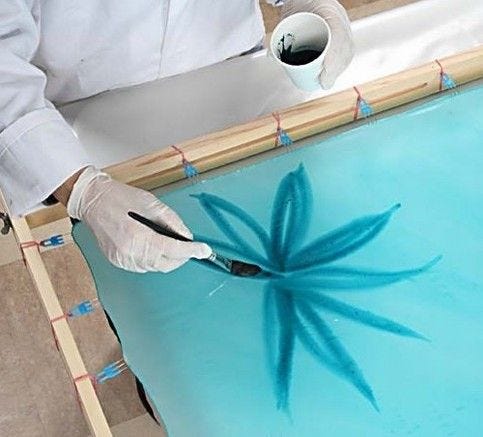
6 Paint a flower in one corner of the wet silk with undiluted paint. You can draw soft lines towards the opposite corner.
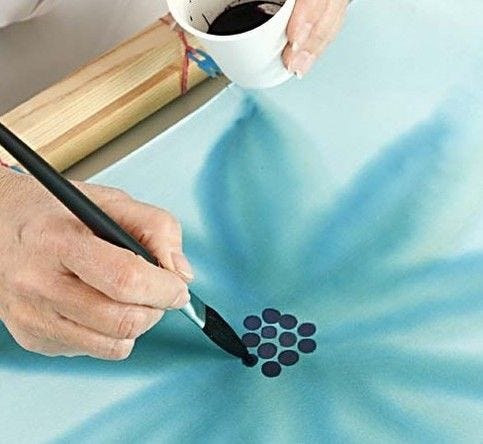
7 When dry, paint the dots in the middle of the flower. Use undiluted purple paint.
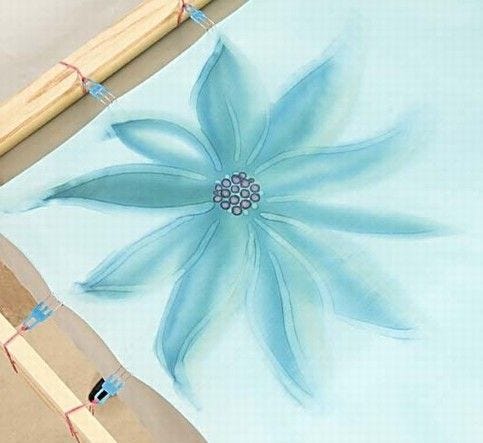
8 You can outline the petals with water if you wish. This shifts the colour and highlights the shapes.
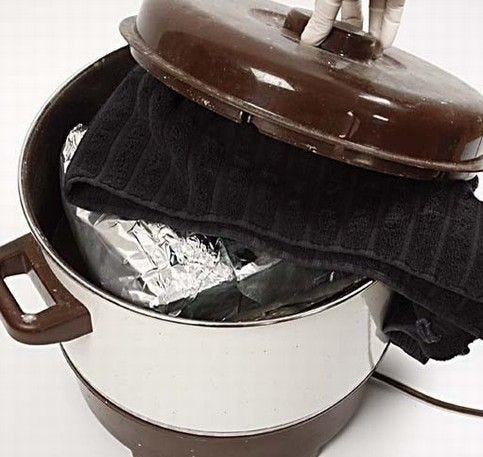
9 Wrap the silk in cotton fabric. Silk should not touch silk. Then wrap the fabric in aluminum foil, and put on a stone in a large pot with some water. Before putting on the lid on the pot, put a towel in-between to absorb condensation. Fix the silk for 1½ - 2 hours, then rinse and iron.

10 Cut off the three corners. See the drawing. Make straps from the off-cuts, sew together, turn and stitch. On the back, cut down approx. 10cm and sew a rolled edge: Fold over approx. 2-3mm, sew a small stitch on both edges. Pull the thread after a few stitches and the edge will roll.
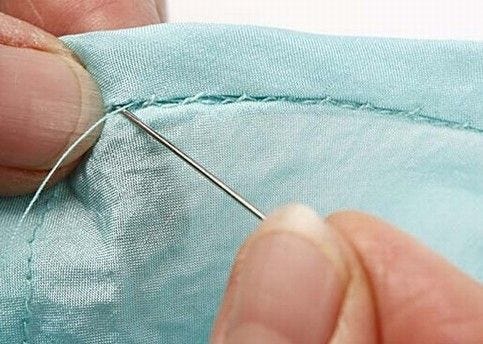
11 Sew the sides together. Make pleats so that the circumference fits. Cut bias bindings from the off-cuts. Sew these onto the front and turn over and stitch on by hand.
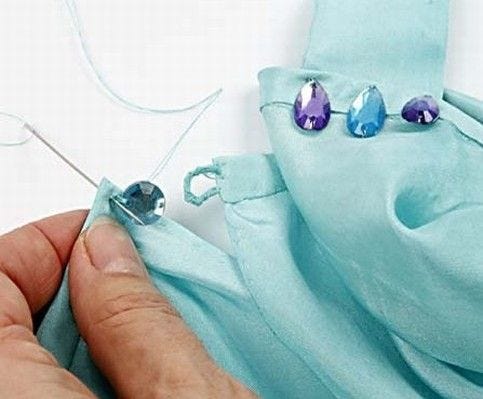
12 At the opening on the back, sew a loop to form a fastener Glue two rhinestones together for the button. Sew on rhinestones on the front as decoration.
Allez aussi explorer dans